
Profile & Settings is your account headquarters — the one place that holds who you are, what your business is, and how your emails sign off. It’s quick to set up and worth doing early, because the details here flow into the rest of the platform: your business info shapes what Darwin writes, and your signature gets attached to the emails you send.
The page is split into two simple tabs. Account Settings covers your business basics — name, type, industry, and currency. Profile covers you personally — your contact details, your preferences, and a full email-signature builder.
Where to find it: Left menu → Settings → Profile & Settings. It sits at the top of the Settings menu, under General, with two tabs across the top: Account Settings and Profile.
Account Settings: your business basics
The Account Settings tab holds the Basic information about your business. These are the details the platform uses to bill you correctly and to give Darwin context about who you are.
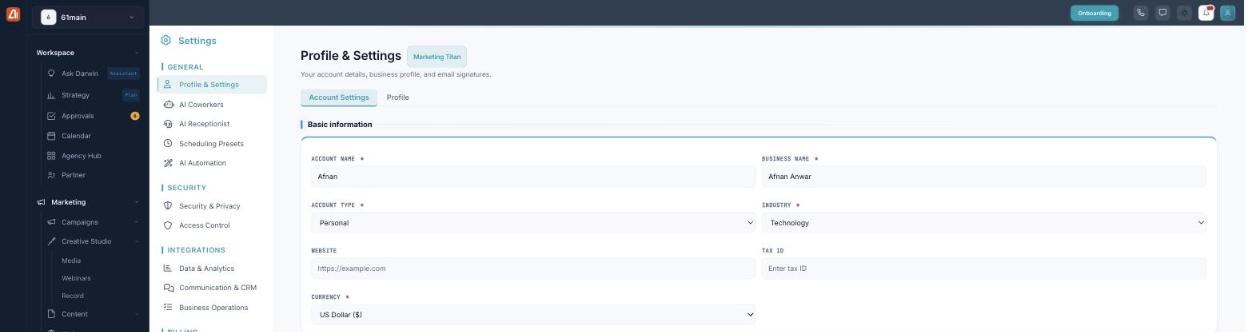
Account Settings — your business name, type, industry, and currency.
| Field | What it’s for |
|---|---|
| Account Name | The name for your account (required). |
| Business Name | Your company or brand name (required). |
| Account Type | Personal or business (required). |
| Industry | Your industry — helps Darwin tailor its output. |
| Website | Your main web address. |
| Tax ID | Your tax identifier, for billing. |
| Currency | The currency for pricing and billing (required). |
Make a change and click Save changes — or Cancel to discard.
Profile: you, your signature, and your preferences
The Profile tab is where you set your personal details. It’s laid out in three panels side by side: Profile information on the left, a New Signature builder in the middle, and your Email signatures on the right.
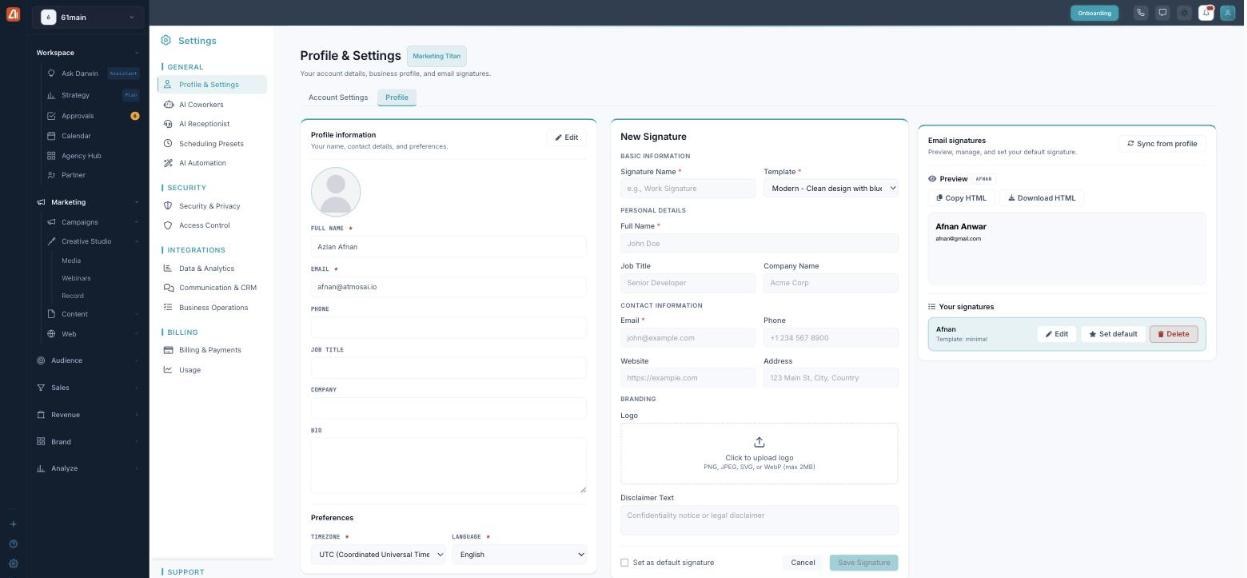
The Profile tab — your details, a signature builder, and your saved signatures.
Profile information
Click Edit to fill in your Full Name and Email (both required), plus optional Phone, Job Title, Company, and a short Bio. You can also add a profile photo.
Under Preferences, set your Timezone and Language — these keep dates, schedules, and the interface aligned to you.
Email signatures: sign off on-brand
The middle and right panels are a complete email-signature system. Build a signature once and it’s ready to attach to the emails you send — consistent, professional, and yours.
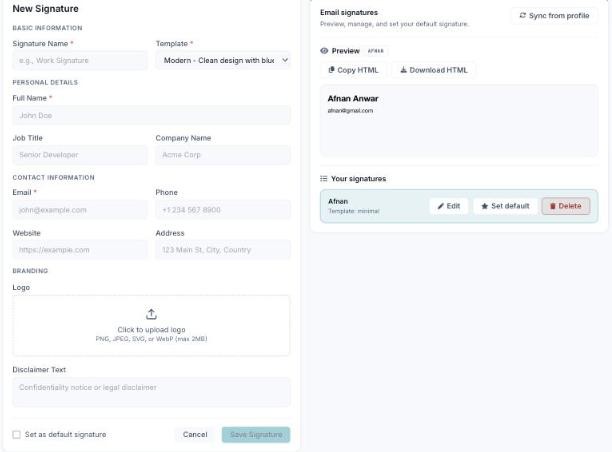
Build a signature, preview it live, and set your default.
Building a signature
In the New Signature panel, give it a Signature Name and pick a Template (for example, “Modern — Clean design”). Then fill in:
- Personal details — Full Name, Job Title, Company Name.
- Contact information — Email, Phone, Website, Address.
- Branding — upload a Logo (PNG, JPEG, SVG, or WebP, up to 2 MB).
- Disclaimer text — an optional confidentiality or legal line.
Tick Set as default signature if it should be the one used automatically, then click Save Signature.
Managing your signatures
The Email signatures panel on the right lists every signature you’ve saved. For each one you can Edit it, Set default, or Delete it. A live Preview shows exactly how it will look, and you can Copy HTML or Download HTML to use the signature elsewhere. Hit Sync from profile to pull your latest profile details straight into a signature.
Fill in your Profile information first, then use Sync from profile — it drops your name, title, and contact details into a new signature so you don’t retype them.
Why this matters beyond settings
These details aren’t just paperwork. Your business name, industry, and profile give Darwin the context it needs to write and design for your company, and your signature makes every email you send look finished and on-brand. Set them once and everything downstream gets a little smarter and a lot more consistent.
Common questions
What’s the difference between the two tabs?
Account Settings is about your business — name, type, industry, currency. Profile is about you — your contact details, preferences, and email signatures.
Which fields are required?
On Account Settings: Account Name, Business Name, Account Type, and Currency. On Profile: Full Name and Email (and Timezone and Language under Preferences).
How do I create an email signature?
On the Profile tab, use the New Signature panel — name it, pick a template, fill in your details and logo, then Save Signature. Tick Set as default to use it automatically.
Can I have more than one signature?
Yes. Every saved signature appears under Your signatures, where you can edit, set a default, or delete each one.
What does “Sync from profile” do?
It pulls the details from your Profile information into a signature, so your name, title, and contact info stay in step without retyping.
Where are the other settings?
The Settings menu on the left has more sections — AI Coworkers, AI Receptionist, Scheduling Presets, Security & Privacy, Access Control, Data & Analytics, Billing & Payments, and Usage. Profile & Settings is just the first one.
Having trouble? If Save is grayed out, a required field is empty — check the ones marked with an asterisk. If your logo won’t upload, confirm it’s a PNG, JPEG, SVG, or WebP under 2 MB. If a signature preview looks empty, fill in the details or use Sync from profile.
What’s next
- Fill in your Account Settings — business name, industry, and currency.
- Complete your Profile information and set your timezone and language.
- Build an email signature and set it as your default.
- Use Sync from profile to keep your signature details current.
- Explore the rest of the Settings menu when you’re ready.