
Create opens the drag-and-drop form builder. You build a form by dragging elements onto the canvas, styling them, and publishing — no code.
Where to find it: Left menu → Marketing → Web → Forms → Create. Part of the Forms guide.
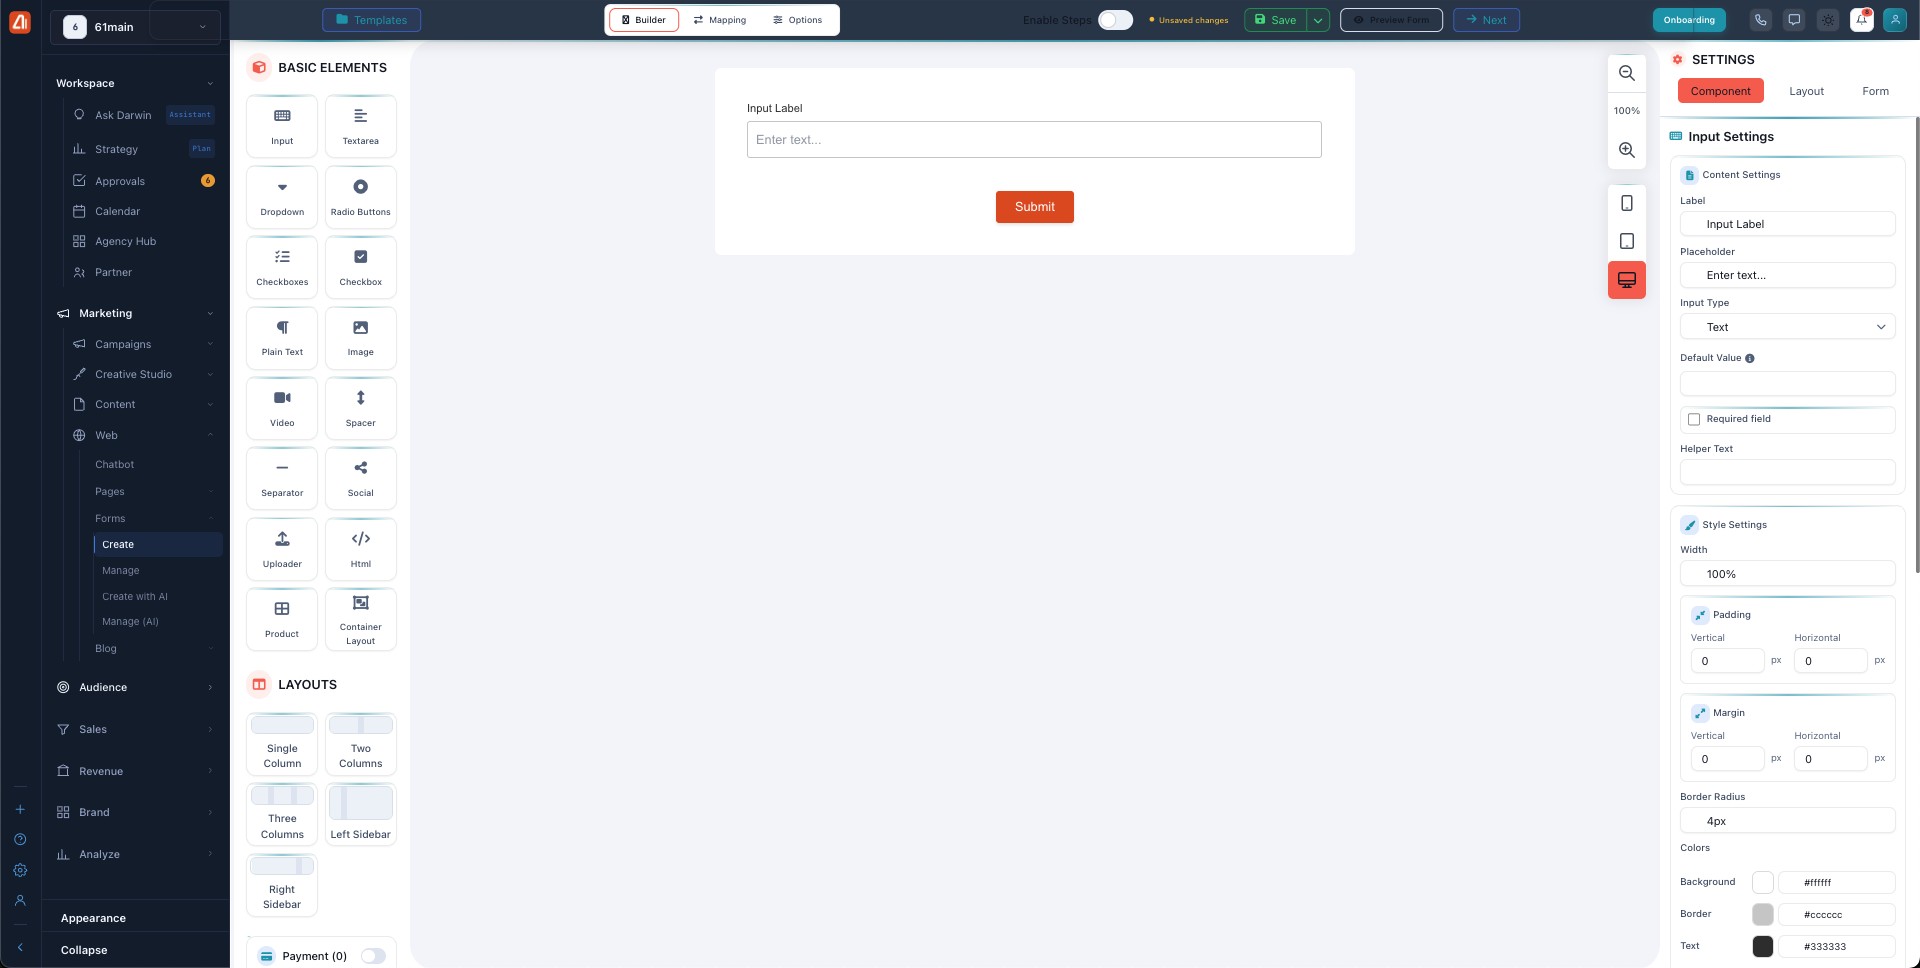
The form builder — drag elements onto the canvas, style them, and publish.
The three panels
The builder has three parts: the elements palette on the left, the canvas in the middle (“Drop components here”), and the Settings panel on the right. Drag an element onto the canvas, then select it to style it.
The elements
Under Basic Elements you get every field type: Input, Textarea, Dropdown, Radio Buttons, Checkboxes, Checkbox, Plain Text, Image, Video, Spacer, Separator, Social, Uploader, HTML, Product, and Container Layout. Under Layouts you can drop a Single, Two-, or Three-Column row, or a Left/Right Sidebar. There’s also a Payment toggle to collect money on the form.
The Settings panel
Selecting the canvas or an element shows its settings, split into Component, Layout, and Form tabs. Layout controls the layout type (e.g. Single Column), styles (background, border radius), spacing (padding, margin), per-column settings, and the outer Canvas Layout (full width or a fixed canvas width). Selecting a field shows that field’s own options under Component.
Builder, Mapping & Options
Three tabs across the top move you through building the form:
- Builder — where you lay out the fields.
- Mapping — pick a destination board (Contacts, Leads, Deals, and so on) and connect each field to a column on it, so every submission creates the right CRM record. You must map all fields before you can move on.
- Options — the form’s settings: how it’s shown (Embedded, Standalone page, Pop-up, Dropdown, or Banner), what happens after submit (a thank-you message or a redirect URL), who gets notified, language, and spam protection.
The Enable Steps toggle turns a long form into a multi-step wizard, and a GDPR & Security section (with spam prevention and consent options) sits under the palette. Note: the Payment tile here is a placeholder in this classic builder.
Mapping — where submissions go
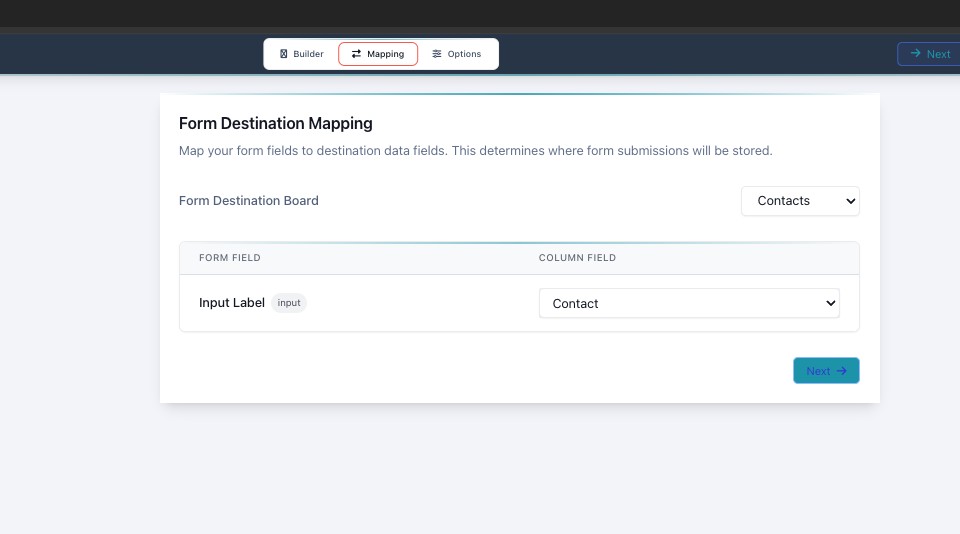
Mapping — pick the board, then match each field to a column.
On the Mapping tab you pick a Form Destination Board — Contacts, Leads, Deals, and so on — and match each form field to a column on that board. This is what decides where form submissions are stored: when someone fills out your public form, their answers are inserted straight into the board you chose here. You must map your fields before you can publish.
Options — how the form behaves
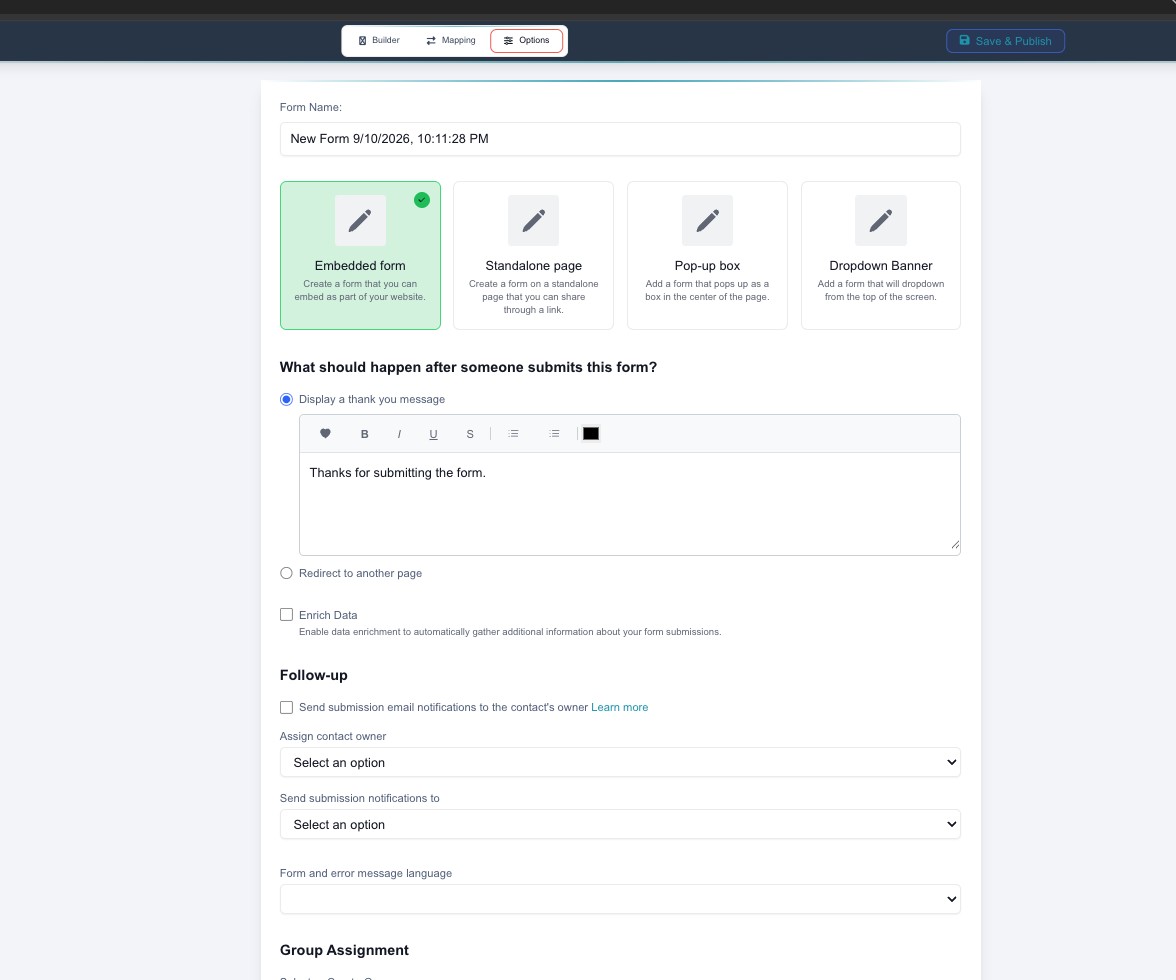
Options — how the form is shown, what happens after submit, and who gets notified.
The Options tab is the form’s own settings:
- Form type — Embedded form (inside your website), Standalone page (its own shareable link), Pop-up box, or Dropdown Banner.
- After submit — show a thank-you message (rich text) or redirect to another page.
- Enrich Data — automatically gather extra info about each submission.
- Follow-up — email the contact’s owner, assign an owner, choose who gets notified, and set the form’s language.
Preview, save, templates & publish
Use the device buttons (desktop, tablet, mobile) and zoom to check the form on each screen, and Preview Form to try it. Save auto-saves as you go (you’ll see “Saved”); the arrow next to Save lets you Save as Template to reuse this design later, and Templates lets you start from a ready-made one. When you’re done, Save & Publish makes the form live and gives you a public link and embed code to drop on your site.
What’s next
- Back to the Forms overview.
- See Manage.
- See Create with AI.
- See Manage (AI).