
The Create Webinar button opens a 5-step wizard. The steps run down the left — Details, Speakers, Registration, Settings, and Review — and Darwin AI helps as you go.
Where to find it: Left menu → Marketing → Creative Studio → Webinars → Create Webinar. Part of the Webinars guide.
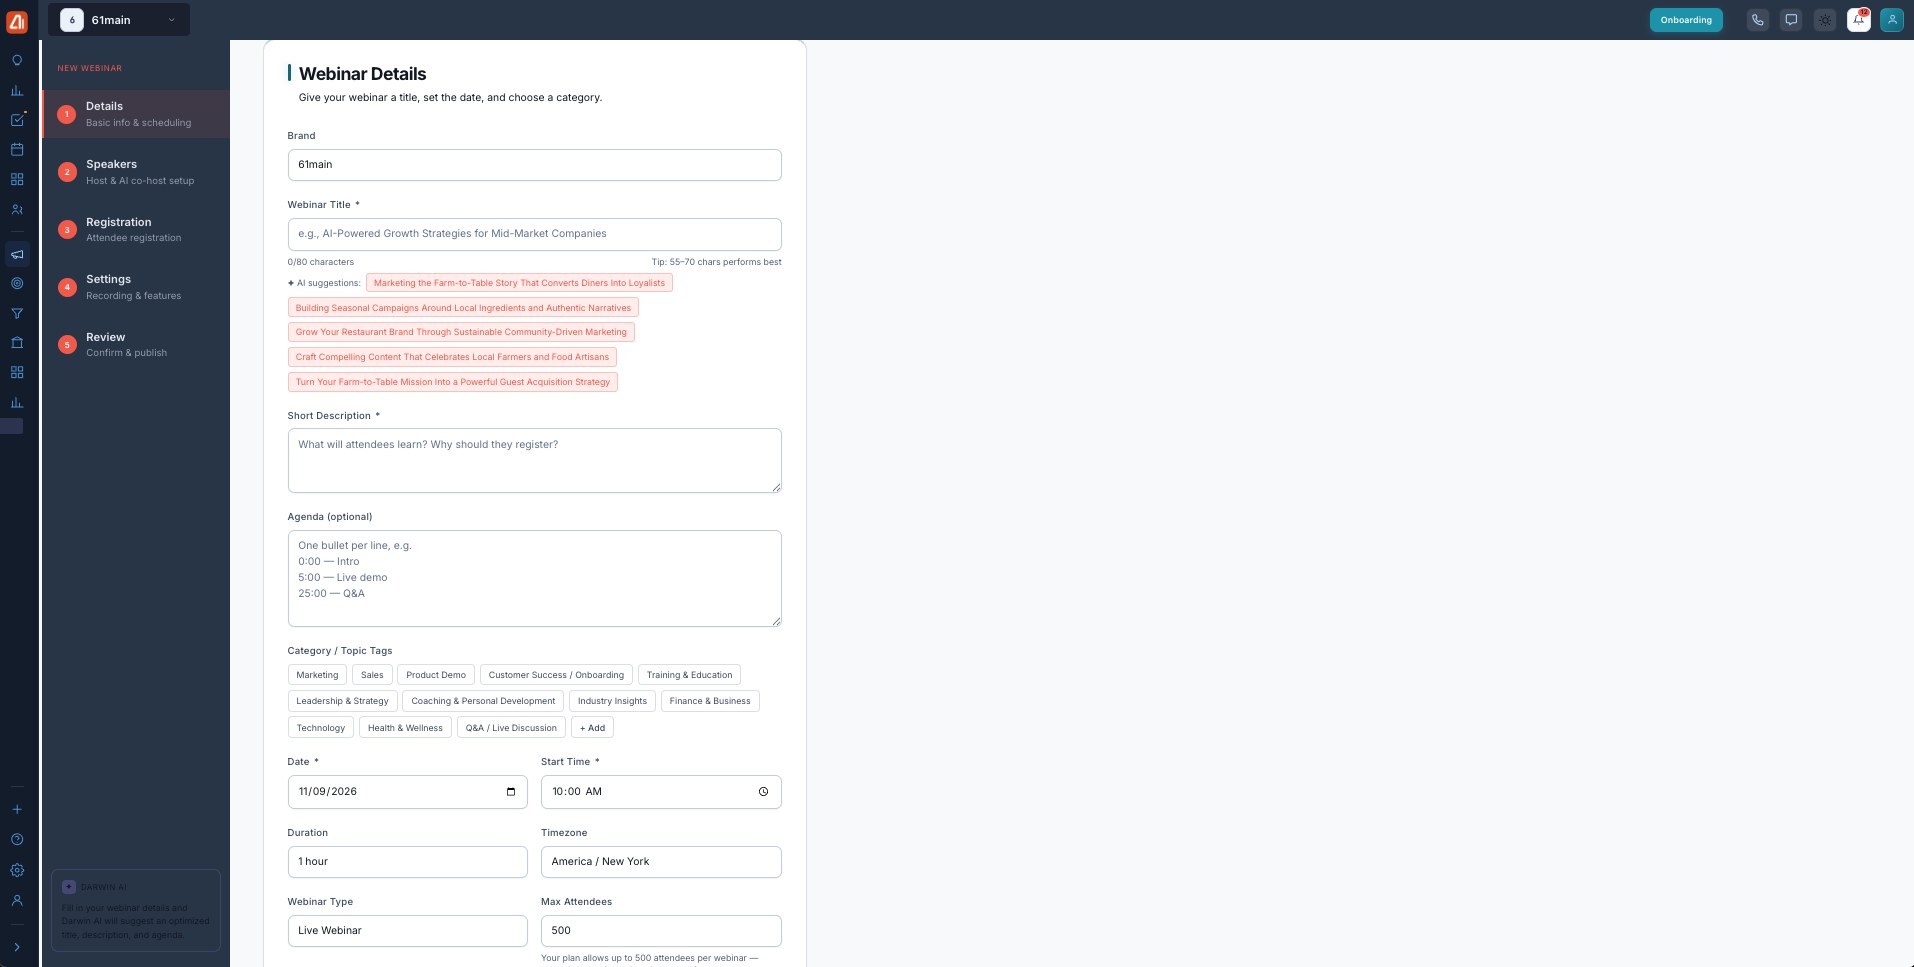
The Create Webinar wizard — details, speakers, registration, settings, then review & publish.
Step 1 — Details
Give the webinar its basics: the Brand, a Webinar Title (with AI title suggestions — a tip notes 55–70 characters performs best), a Short Description, an optional Agenda (one line per item), and Category / Topic Tags. Then set the Date, Start Time, Duration, Timezone, Webinar Type (e.g. Live Webinar), and Max Attendees.
Step 2 — Speakers
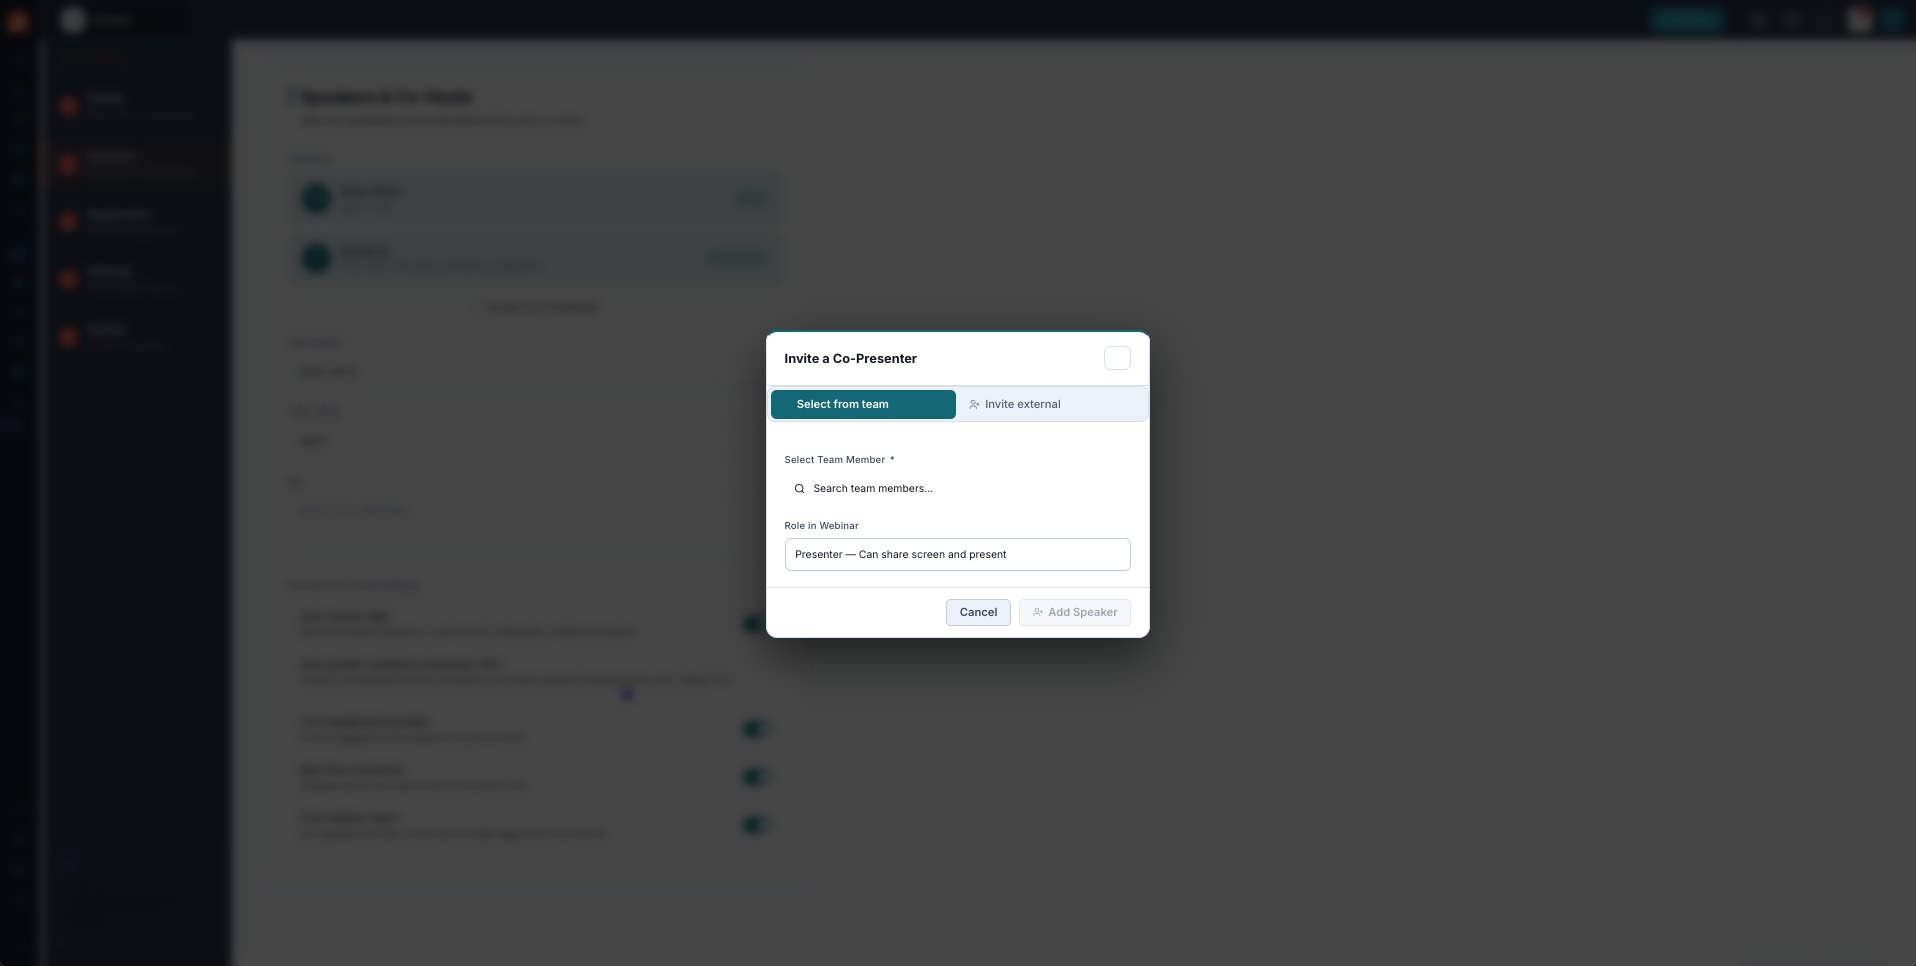
Add co-presenters — from your team or an external guest.
Set up who’s presenting. Your host is listed, plus Darwin AI as co-host. Use Add Co-Presenter to open the Invite a Co-Presenter dialog: Select from team or Invite external (by email), and pick a Role in Webinar (e.g. Presenter — can share screen and present).
Step 3 — Registration
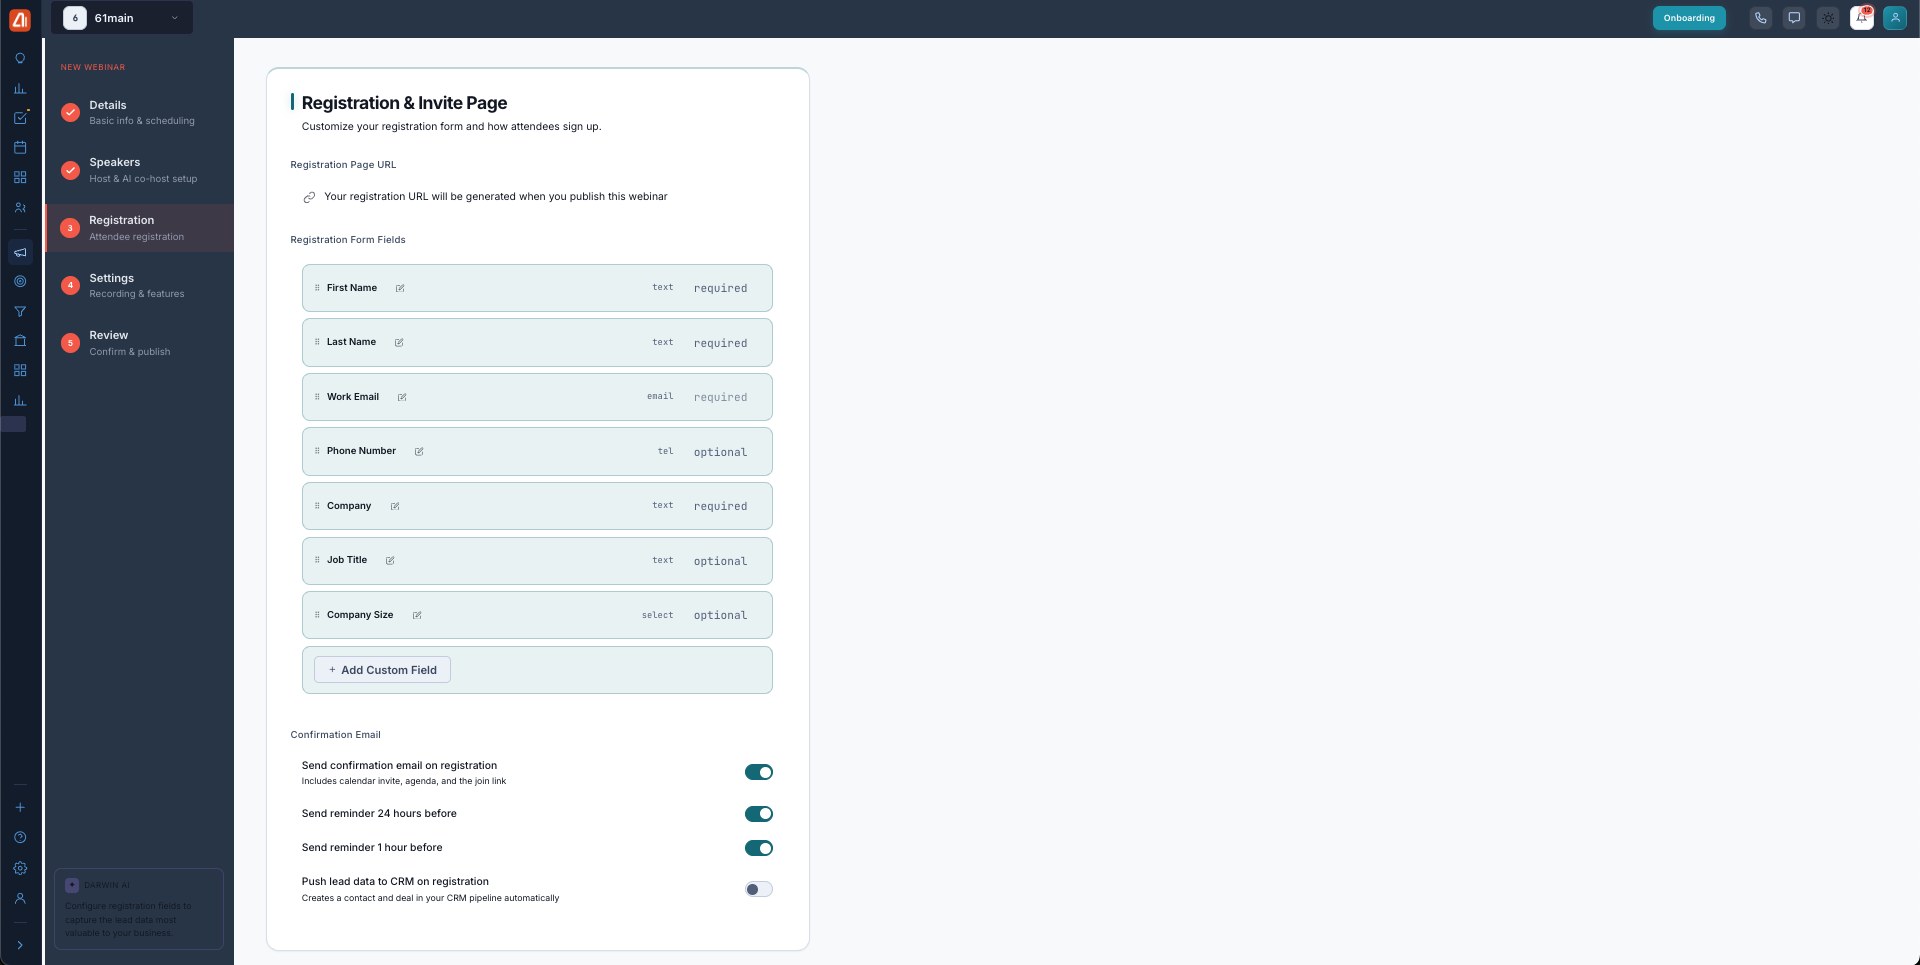
Build the registration form and confirmation emails.
Design the sign-up form. The Registration Page URL is generated when you publish. The default form fields — First Name, Last Name, Work Email, Phone, Company, Job Title, Company Size — can be reordered, edited, or marked required/optional, and + Add Custom Field adds your own. Under Confirmation Email, toggle a confirmation on registration, a reminder 24 hours before, a reminder 1 hour before, and Push lead data to CRM (creates a contact and deal automatically).
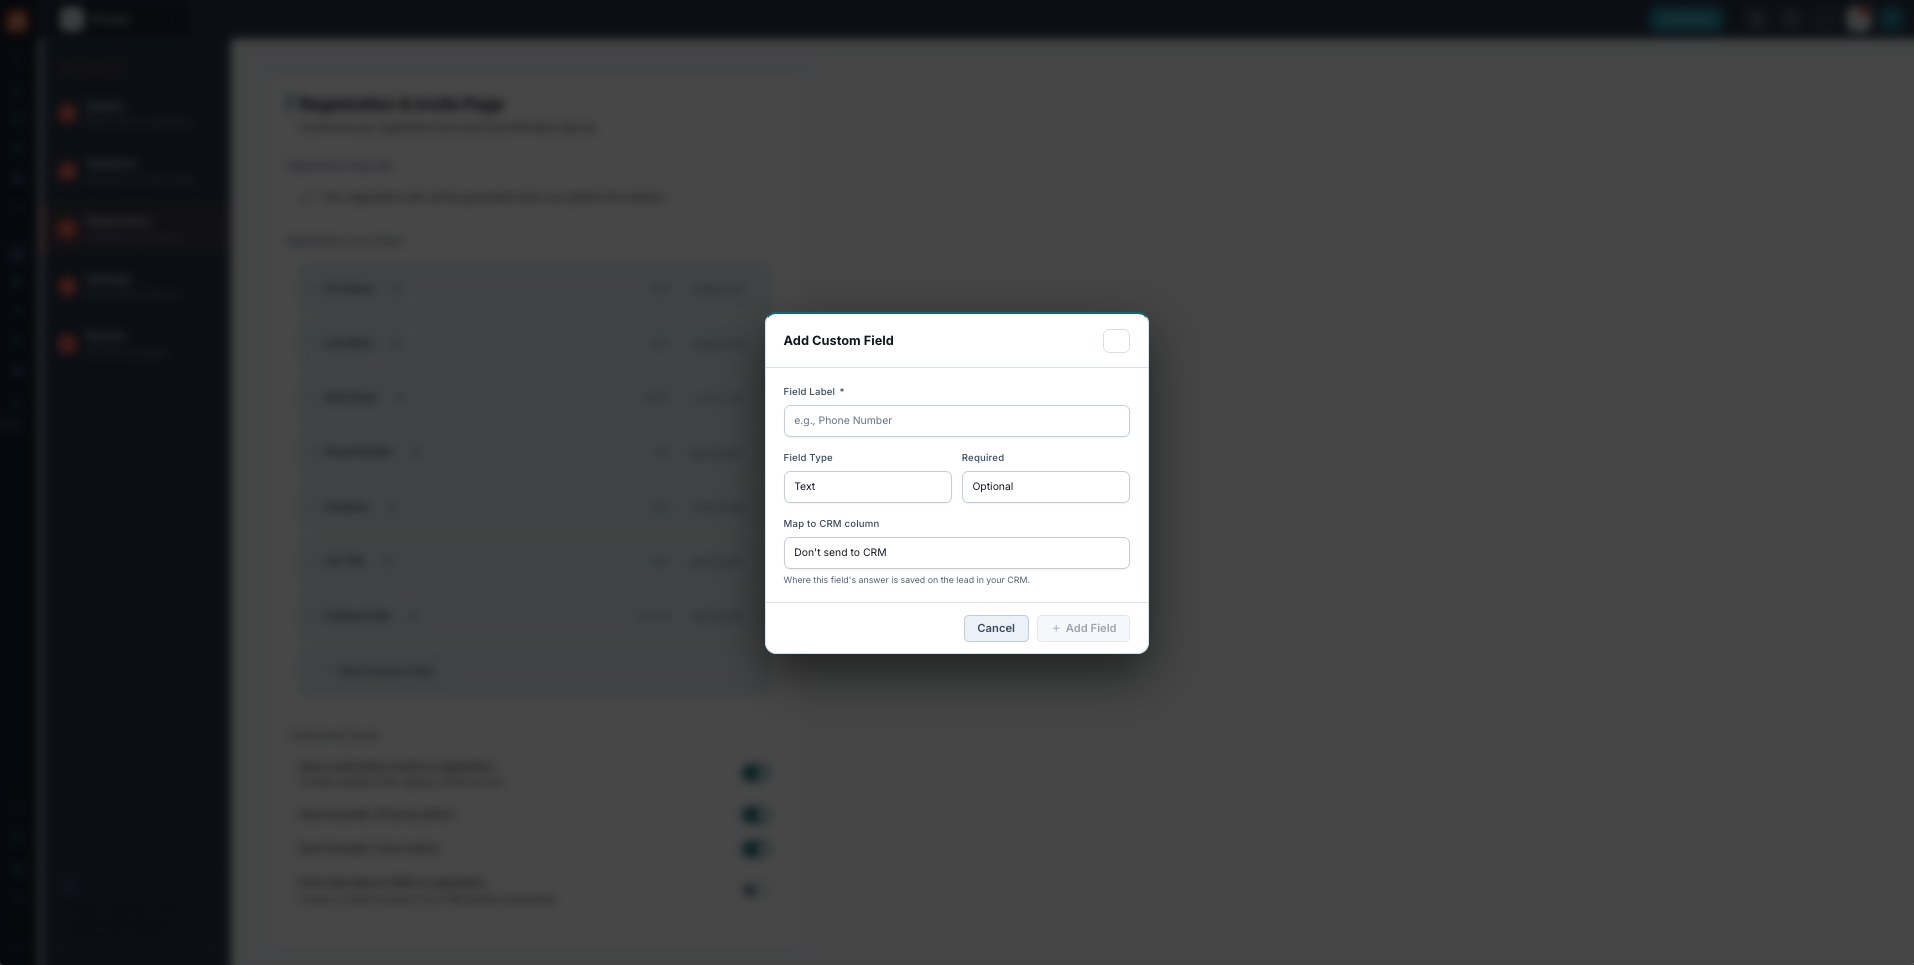
Add Custom Field — capture your own data and map it to a CRM column.
+ Add Custom Field opens a dialog where you name the field, pick its type (Text, Email, Phone, Long Text, or Dropdown), set it required or optional, and map it to a CRM column so the answer is saved on the lead.
Step 4 — Settings
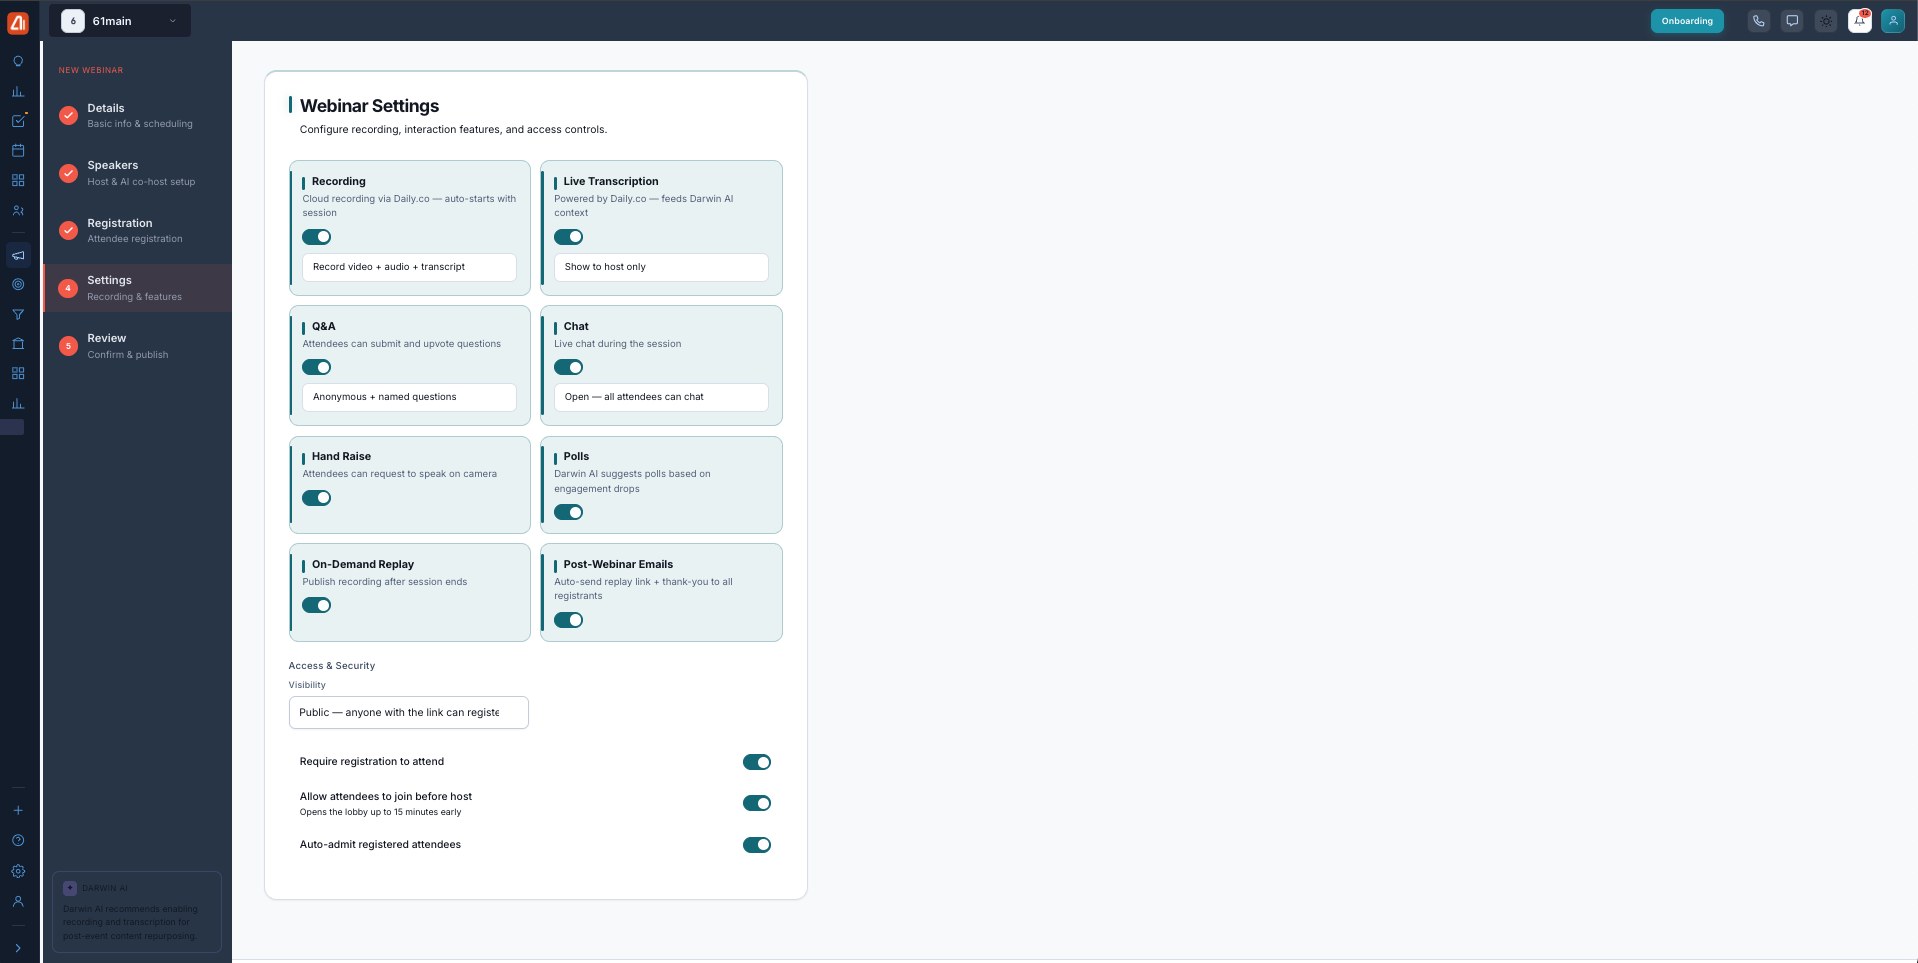
Turn on the features and access rules for the session.
Choose the session’s features: Recording (cloud, auto-starts), Live Transcription (feeds Darwin AI), Q&A, Chat, Hand Raise (attendees request to speak on camera), Polls (Darwin suggests them), On-Demand Replay, and Post-Webinar Emails. Under Access & Security, set Visibility (e.g. Public), Require registration, Allow attendees to join before host, and Auto-admit registered attendees.
Step 5 — Review & Publish
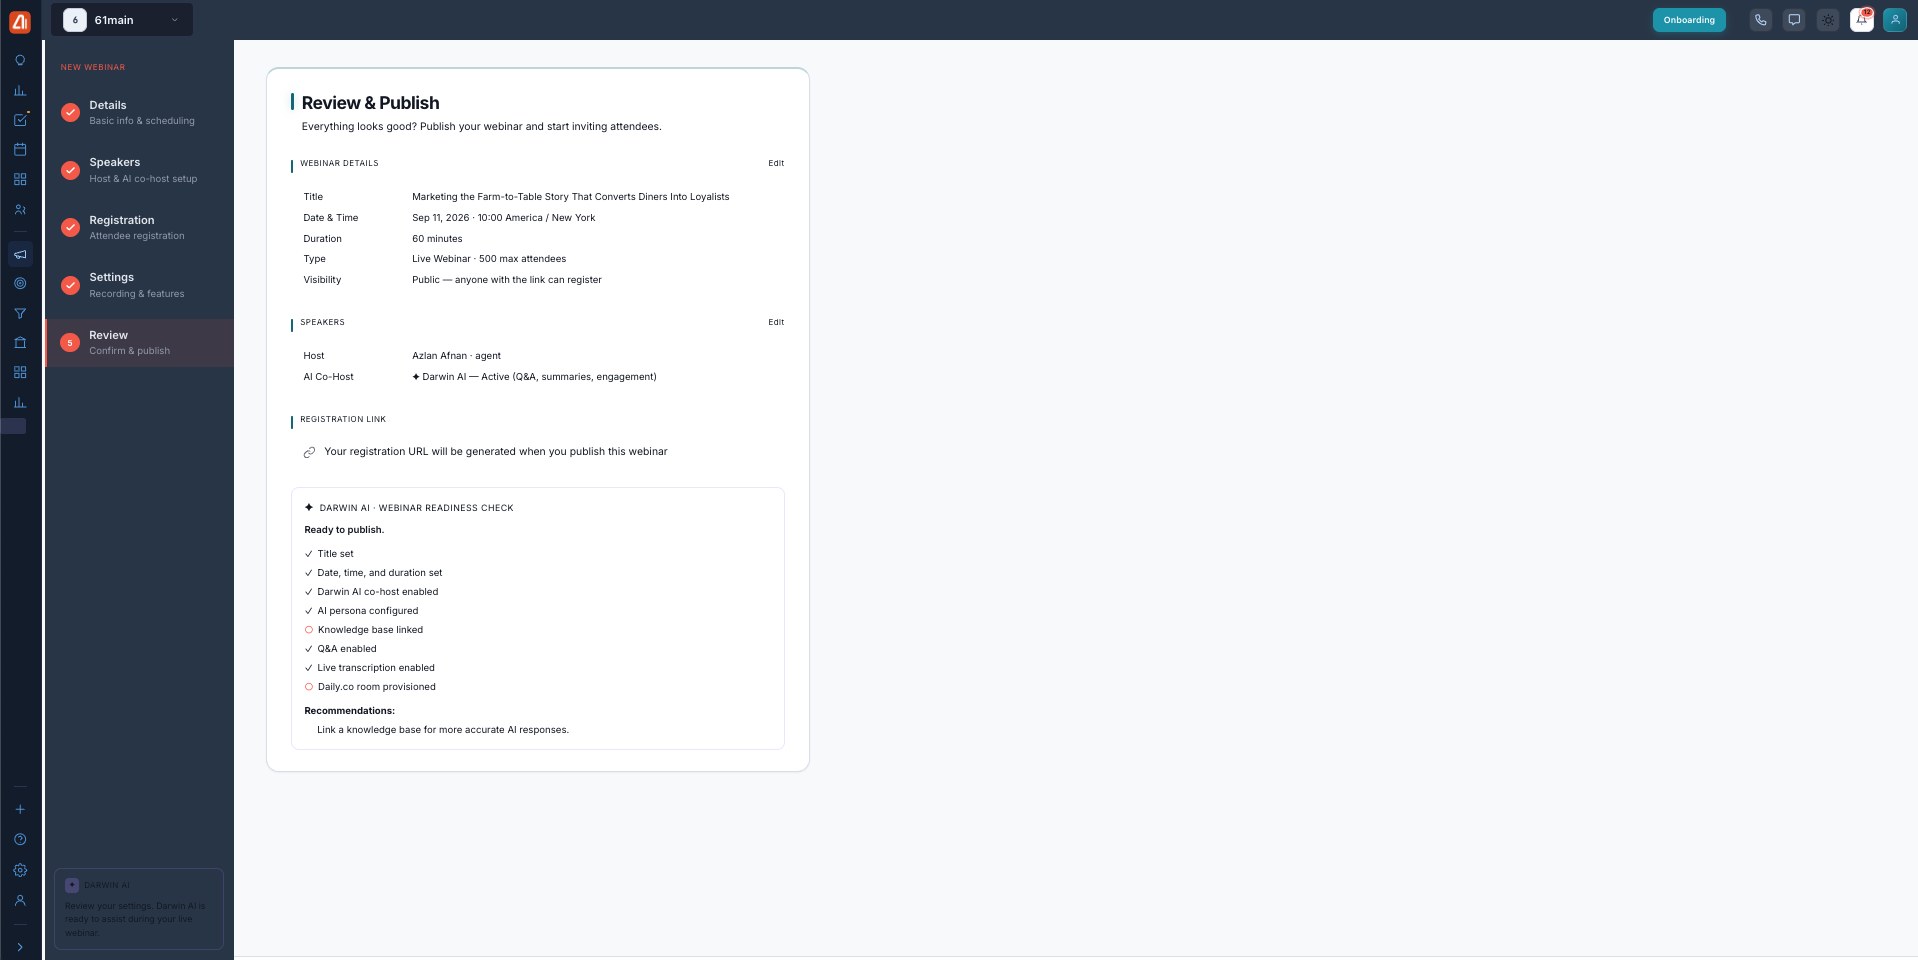
Review everything, run the readiness check, then publish.
The last step summarizes your details, speakers, and registration link, and runs a Darwin AI Webinar Readiness Check — ticking off title, date/time, Darwin co-host, AI persona, knowledge base, Q&A, live transcription, and the room — with recommendations (e.g. link a knowledge base for better AI answers).
Save, template, or publish
At the bottom you can Save as Draft (finish later — it lands in the Drafts tab), Save as Template (reuse this setup for future webinars), go Back a step, or Publish Webinar to make it live and generate the registration link. A published webinar with a future date is scheduled until you start it.
What’s next
- Back to the Webinars overview.
- See Registration & join page.
- See Rehearse & go live.
- See The live room.
- See Post-webinar report.