
Appointment scheduling lets you publish a booking page so customers pick a time that works — and it books straight onto your calendar.
Where to find it: Left menu → Calendar → the Create menu → Create Appointment (or My Bookings). Part of the Calendar guide.
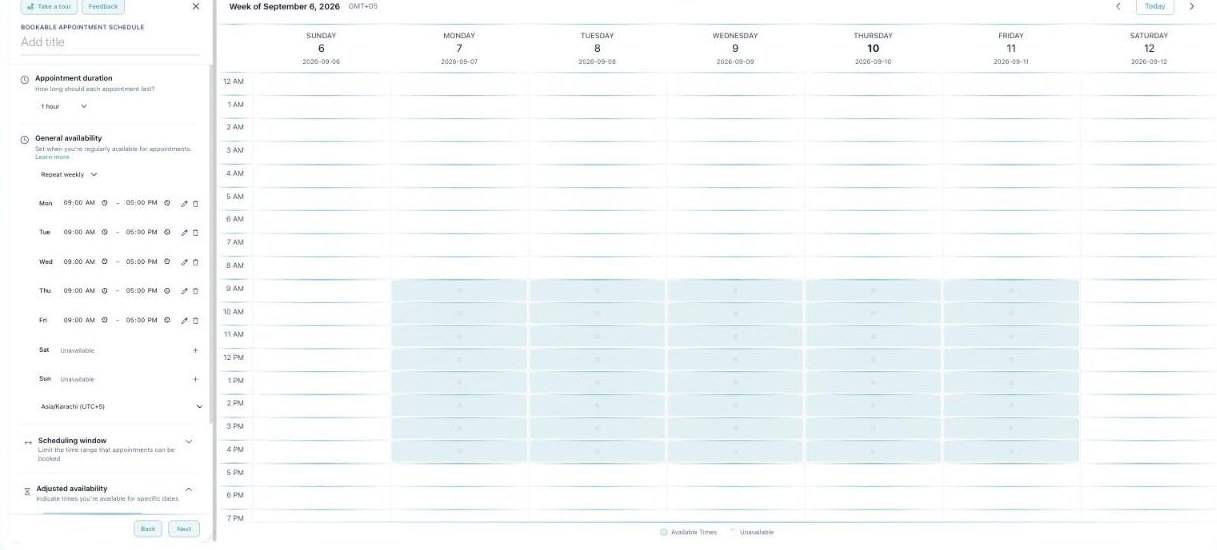
The scheduler — set your hours once, share a link, and bookings land on your calendar.
Set your availability
The builder starts with when you’re bookable: the appointment duration (15 min to 2 hours), your weekly availability (per-day time ranges, defaulting to Mon–Fri 9–5), your time zone, a scheduling window (how far ahead people can book and how much notice you need), and date overrides for one-off changes. You can add buffer time between bookings and cap how many you take per day or week. Turn on calendar conflict checking so it only offers slots you’re actually free, and block the time on your calendar once booked.
Design the booking page
Next you brand the page customers see: a photo and display name, how you’ll meet (in person, phone, or a video provider), a description, and any custom questions to ask when they book (text, email, phone, dropdown, checkbox, and more — each optional or required).
Confirmations & reminders
Finally, set what happens after a booking: a confirmation email, a calendar invite (.ics), and reminder emails before the meeting. You can also require that you approve each booking first. When you’re done, you get a shareable booking link to send or embed.
Manage bookings
My Bookings lists your booking types — copy a link, pause, edit, or delete one — and each type’s bookings, which you can filter, approve, cancel, or export. When someone books, it appears on your calendar as an Appointment, and they get an add-to-calendar link plus a self-serve way to reschedule or cancel.
What’s next
- New here? The Take a tour button walks you through the whole builder step by step.
- Back to the Calendar overview.
- See Month view.
- See Week view.
- See Day view.
- See List view.
- See Creating an event.
- See Calendars & colors.