
When the design is done, set the email’s details, send it, and save it as a template so you never rebuild the same thing twice.
Where to find it: Email Builder. Part of the Email Builder guide.
Email settings
The Settings tab is where you set the details that decide how your email arrives and who it’s from. Fill these in before you send.
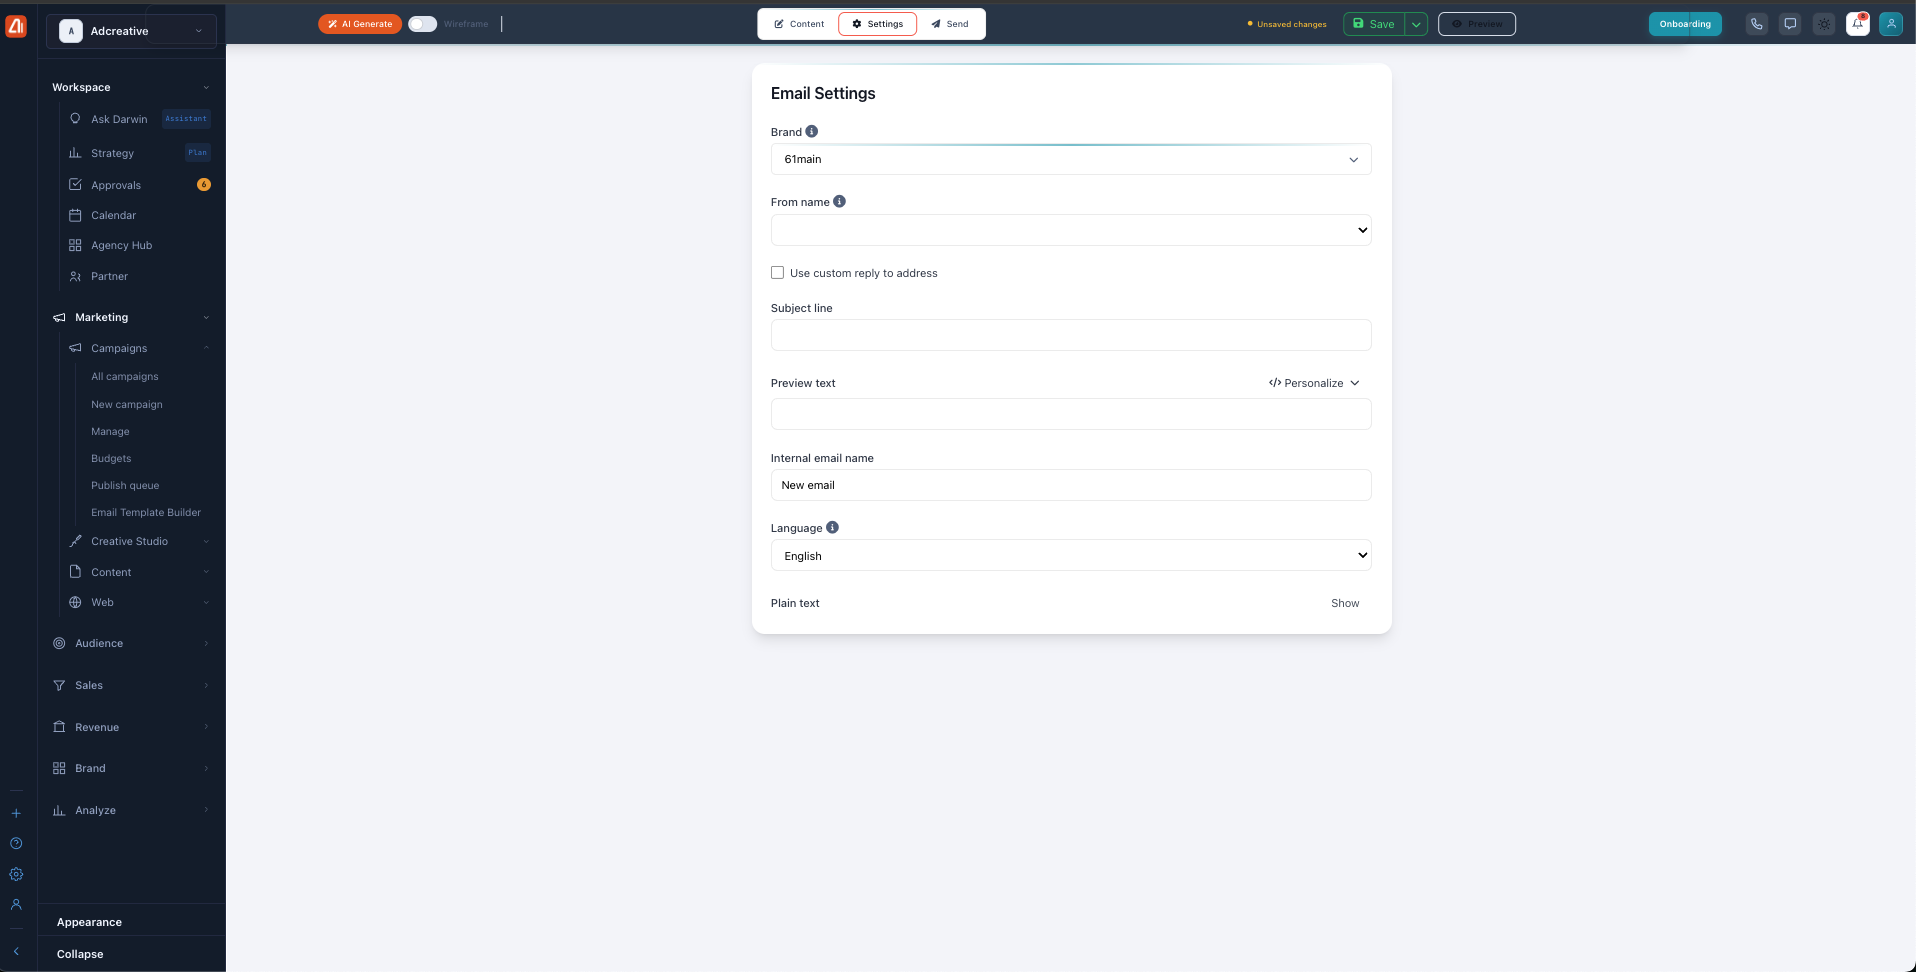
The Settings tab — set the brand, from name, subject line, preview text, and language.
| Field | What it does |
|---|---|
| Brand | Choose which brand this email belongs to. |
| From name | The name that shows up in your reader’s inbox. |
| Custom reply-to address | Optional — send replies to a different address than the sending one. |
| Subject line | The headline of your email in the inbox. Use Personalize to insert merge fields. |
| Preview text | The short line of text shown after the subject in most inboxes. |
| Internal email name | A name just for you and your team to find this email later. |
| Language | The language of the email. |
| Plain text | Optional — add a plain-text version for inboxes that don’t show the designed one. |
Send your email
The Send tab is the last step. Here you pick who gets the email, when it goes out, and you can send yourself a test first.
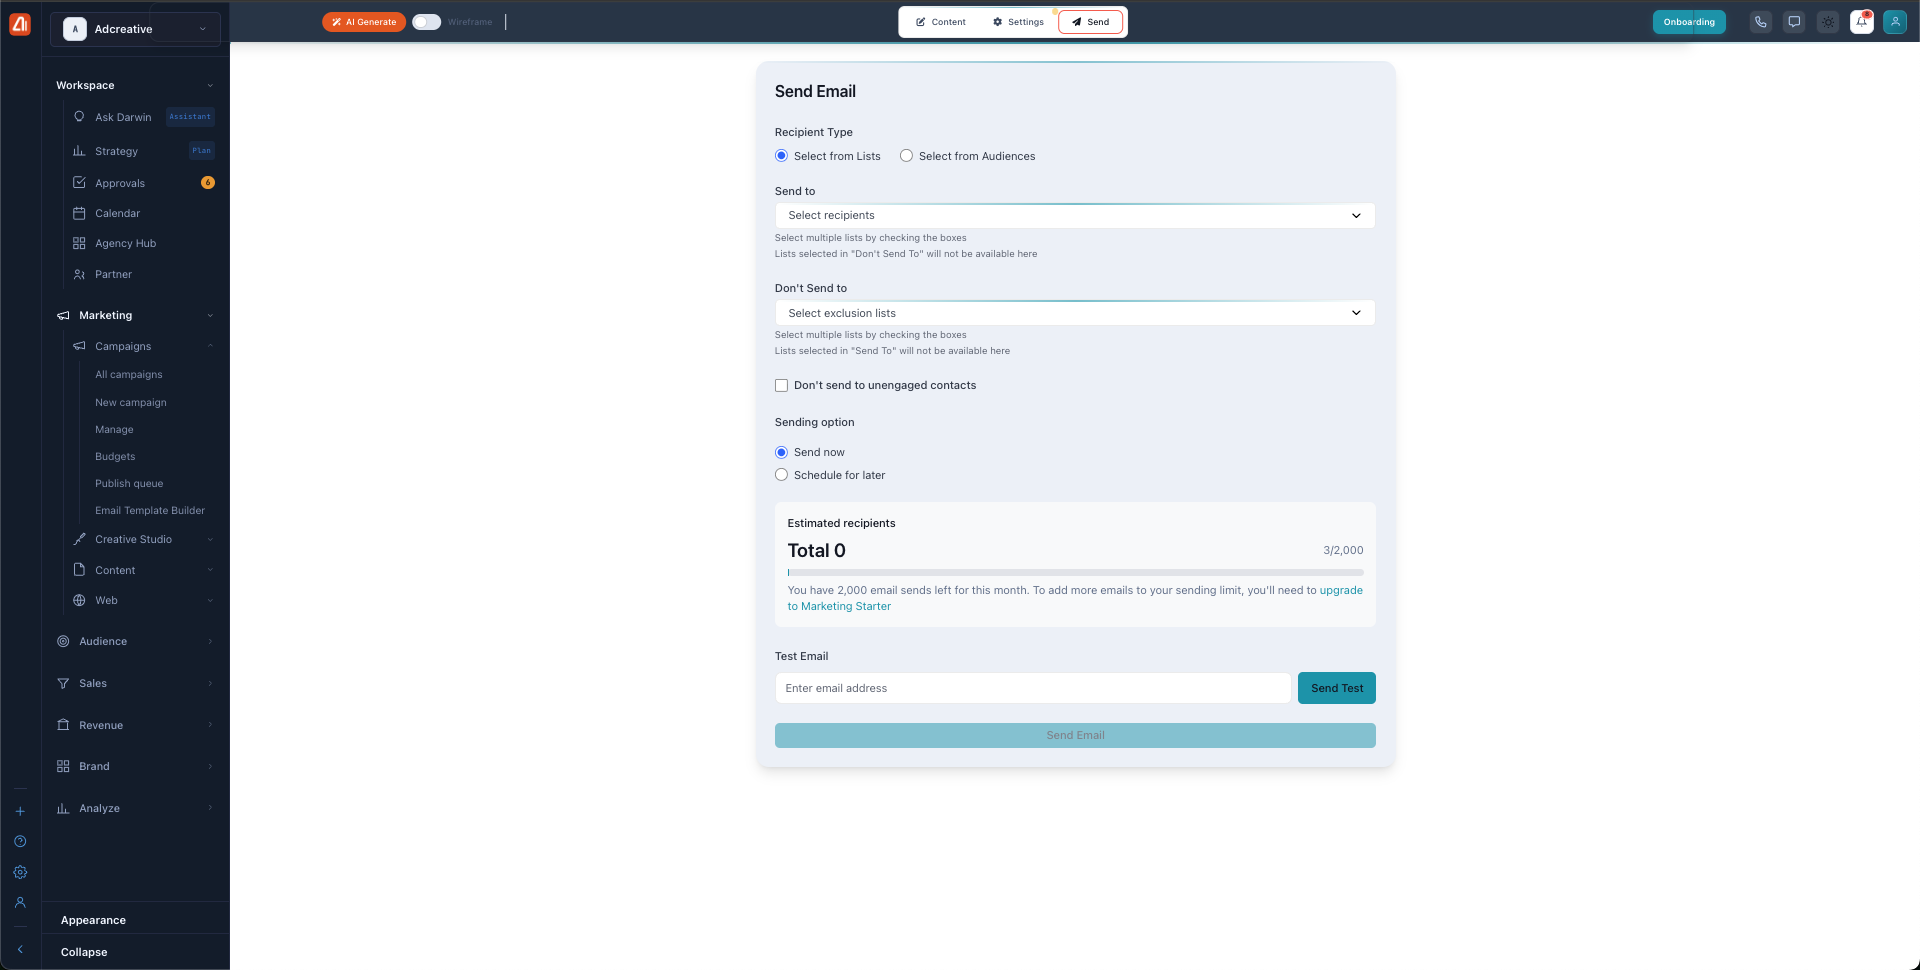
The Send tab — pick who gets the email, send a test, then send now or schedule for later.
- Pick a Recipient Type — Select from Lists or Select from Audiences.
- Choose your Send to list(s) or audience(s), and optionally add Don’t Send to exclusion lists.
- Tick Don’t send to unengaged contacts to protect your sender reputation.
- Pick a Sending option: Send now or Schedule for later.
- Use Send Test to email yourself a copy first, then click Send Email.
The Estimated recipients panel shows your total reach and how many email sends you have left this month (for example, 2,000). Keep an eye on it so you don’t run out mid-campaign.
You must connect an email provider on the Integrations page before you can actually send. Until then, the send button stays grayed out.
Save it as a template
The green Save button has a small dropdown, and the two options do different things. The normal Save just saves your current email so you can come back to it. Save as New Template makes a reusable copy you can use again and again.
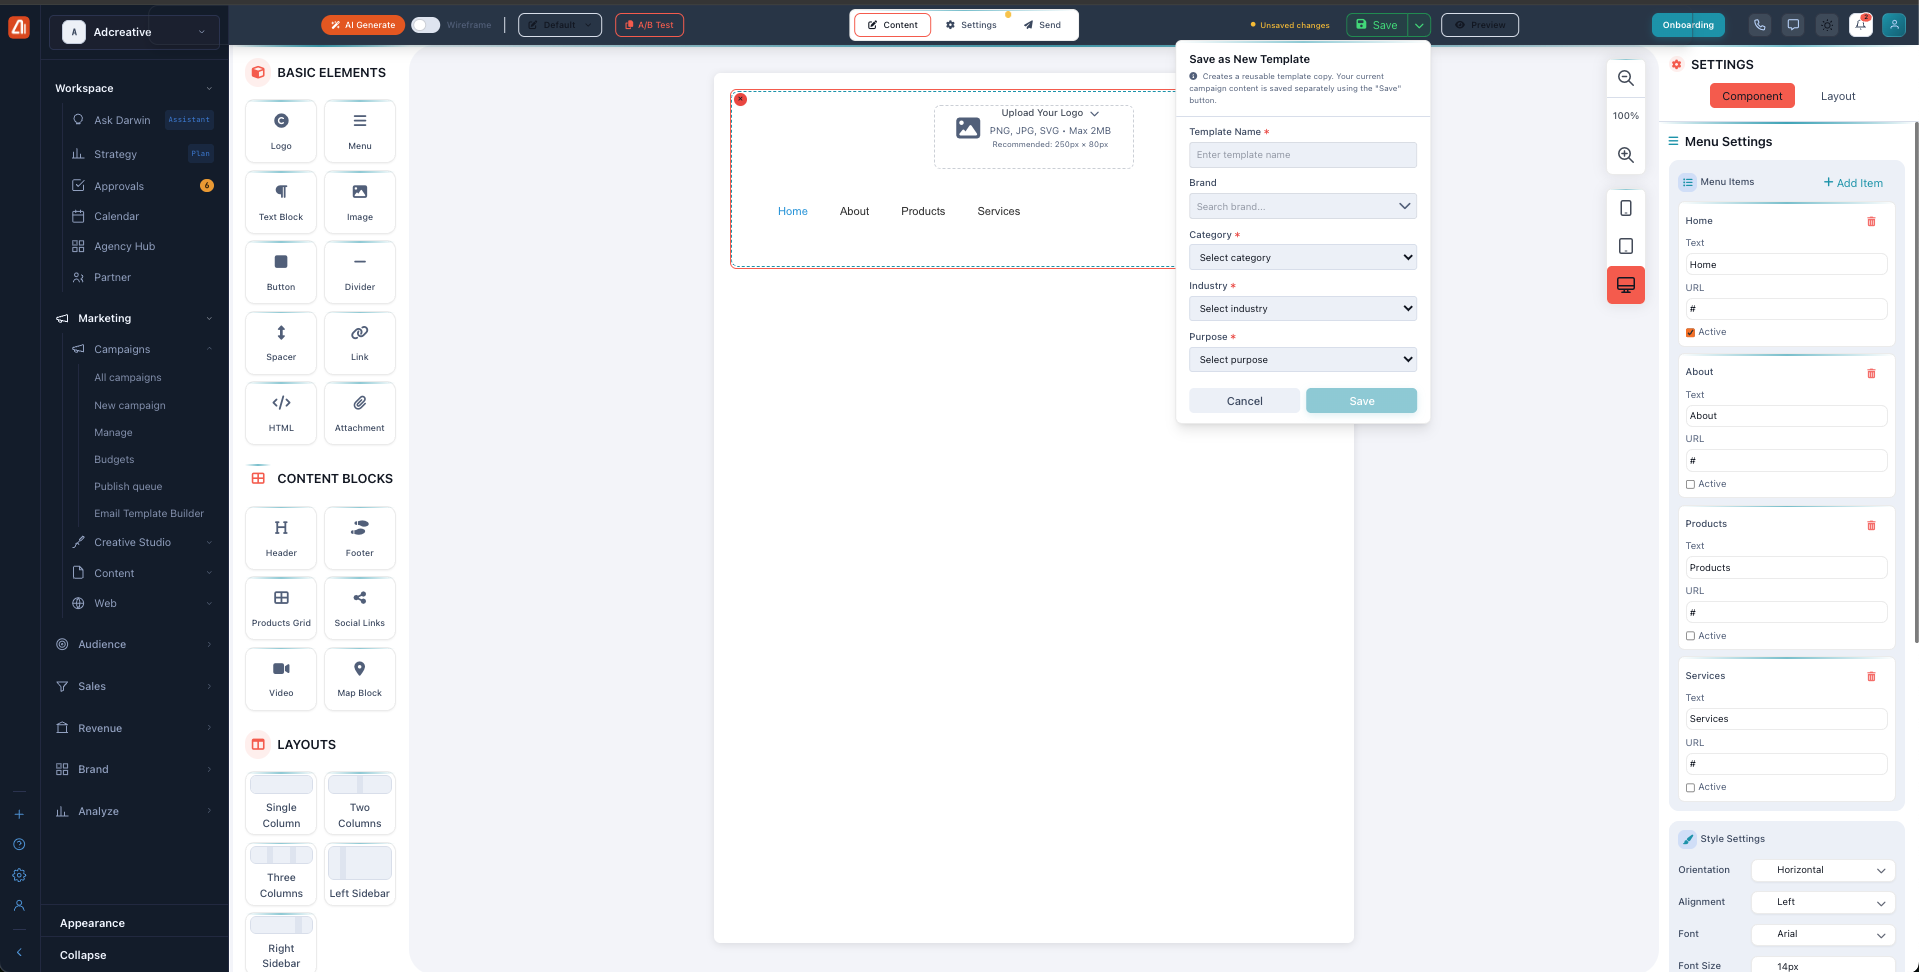
Save as New Template — turn any email into a reusable template with a name, brand, category, industry, and purpose.
When you choose Save as New Template, a small window opens. Give it a Template Name, then pick the Brand, Category, Industry, and Purpose, and Save. Saved templates can be reused across future campaigns and show up in the “Default” template picker at the top of the builder — so a great email you build once becomes a starting point forever.
How Darwin helps you build emails
Darwin does the hard parts so you don’t have to. Describe the email you want and it writes the subject line, headlines, body, and buttons, then designs the layout and colors to match your brand. It refines the voice so it sounds like you, and it checks deliverability and spam triggers before you send. Inside the builder, flip on AI Generate to have it fill any section for you. And you always stay in control — every word, block, and color is yours to edit.
What’s next
- Back to the Email Builder overview.
- See Let Darwin Write It.
- See Drag & Drop Editor.