
The Form Customizer is where you design the application candidates fill in. Add or reorder steps, choose the fields on each step, start from a template, and tie the form to your territories — then it is live on the Agent Onboarding Portal.
Where to find it: Left menu → Sales → Team & Resources → Sales Teams → Form Customizer. Part of the Team Management guide.
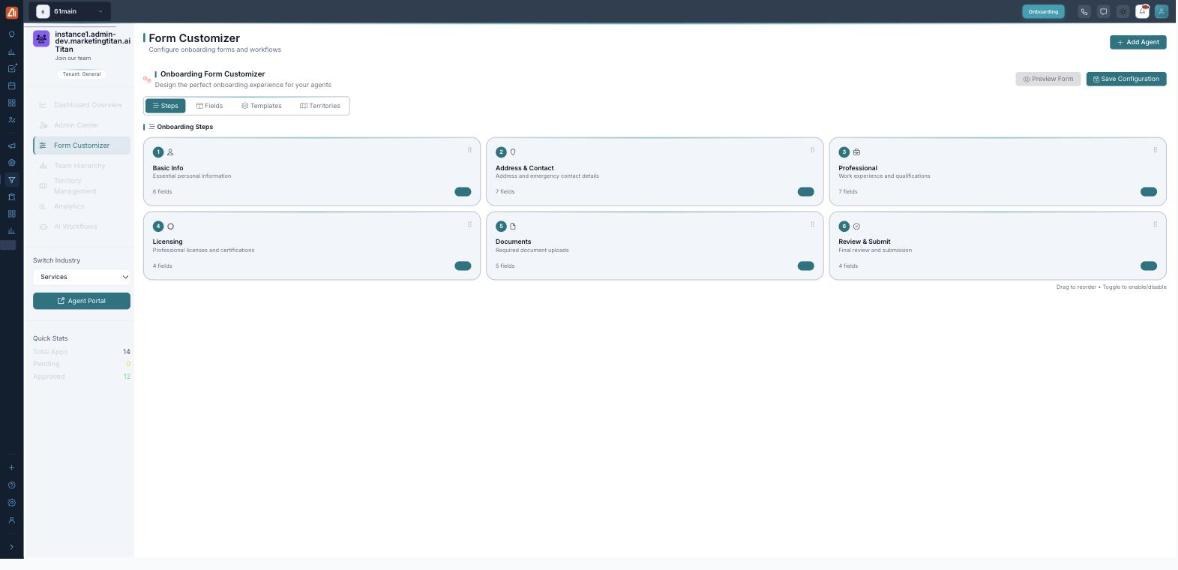
The Form Customizer — the six-step application builder with Steps, Fields, Templates and Territories.
The four sub-tabs
| Sub-tab | What you do there |
|---|---|
| Steps | Add, rename, reorder and remove the steps of the application. |
| Fields | Choose the questions on each step and mark which are required. |
| Templates | Start from a ready-made form and adjust it, instead of building from scratch. |
| Territories | Connect the form to your territories so applications route correctly. |
The default six steps
Each step is a card showing its field count. You can drag to reorder the steps and toggle a step on or off.
- Basic Info (6 fields) — name, date of birth, business email.
- Address & Contact (7 fields) — where the candidate is and how to reach them.
- Professional (7 fields) — experience and qualifications.
- Licensing (4 fields) — licenses and certifications.
- Documents (5 fields) — files the candidate uploads.
- Review & Submit (4 fields) — a summary before they send it.
💡 Check before you ship: Use Preview Form to see exactly what candidates will see — then Save Configuration to publish your changes to the live portal.
Edit a step and its fields
- Open Form Customizer and stay on the Steps sub-tab.
- Add a step, or click an existing one to rename it or change its order.
- Switch to Fields to add questions to that step and mark the required ones.
- Save — the change appears immediately on the public portal.
💡 Keep it short: The portal promises “6 easy steps (10–15 minutes).” Every extra required field costs you completed applications — ask only for what you truly need up front.
Start from a template
- Open the Templates sub-tab.
- Pick a template that fits your industry.
- Apply it, then trim or add fields on the Steps and Fields sub-tabs.
FAQ
Do changes go live straight away?
Yes — once saved, the next candidate to open the portal sees the updated form.
Can I make a field required?
Yes — on the Fields sub-tab each field can be marked required so the candidate cannot skip it.
How do territories connect to the form?
The Territories sub-tab ties the form to your territory set so a submission can be routed to the right area — see Territory Management.