
You can run as many chatbots as you need — one for support, one for lead-gen, one per brand. This is where you create them, see how each is doing, and pick which one you’re editing.
Where to find it: Left menu → AI Chatbot → Manage Chatbots. Part of the AI Chatbot guide.
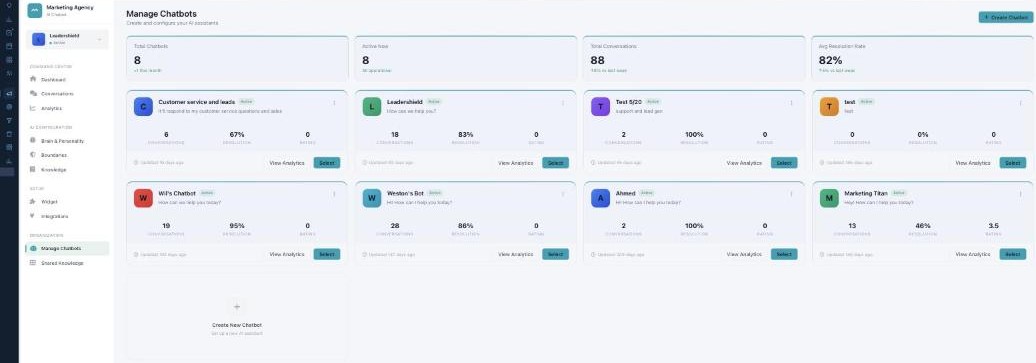
Manage Chatbots — every assistant in your workspace, in one place.
The overview
The cards across the top summarize every bot together: Total Chatbots, Active Now, Total Conversations, and Avg Resolution Rate.
Each chatbot card
Every bot shows its name, status (Active / Paused / Draft), a short description, and its stats (Conversations, Resolution %, Rating). View Analytics opens its numbers; Select makes it the bot you’re editing everywhere else. The ⋮ menu adds Duplicate, Pause / Resume, and Delete.
Creating a chatbot
Click Create Chatbot and:
- Pick a template (or copy from an existing bot).
- Give it a Name, Description, and a Purpose (Sales & Lead Generation, Customer Support, Onboarding & Training, FAQ & Information, or Custom).
- Choose a Brand and brand color.
- Set Knowledge Inheritance — how much of your shared org knowledge it can use (All Org, Selective, By Category, or Chatbot Only).
After it’s made, configure its brain, boundaries, and knowledge.
Switching between bots
The chatbot selector at the top of the AI Chatbot menu decides which bot every other page edits. Switch it, and Brain, Boundaries, Knowledge, Widget, and Conversations all follow.
What’s next
- Back to the AI Chatbot overview.
- See Brain & Personality.
- See Boundaries.
- See Knowledge.
- See Shared Knowledge.
- See The web Widget.